![]() Further reports:
Further reports:
Summer 2023
Winter 2022/23: Working on the turret
Winter 2021/22 and summer 2022: Working on the turret
Winter 2020/21 and summer 2021: The electrical system and hull
Winter 2019/20 and summer 2020: Turret and the electrical system
We have been working exclusively on the turret
Another interesting part which we were working on is the tensioner for the breech of the gun, which is mounted on the rear bottom left of the breech block. It consists of a cylindrical pipe which contains the opening and closing spring of the breech. Tension is applied via a lever which is moved when the barrel retracts and the lever passes a section of the left deflector plate. The unit was disassembled, the broken springs were replaced and returned to working conditions.
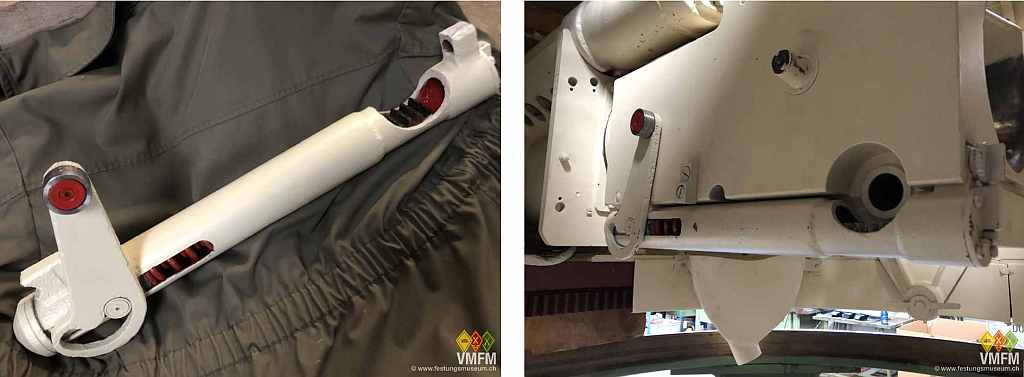
Since the barrel will never retract again after a shot the automatic breech mover will not work. In any case several parts for that are missing. Nonetheless, we plan to reconstruct missing parts and achieve a manual movement of the breech. The most essential piece to obtain is the deflector unit. It has the shape of a U the lower line of which is bolted to the cradle.
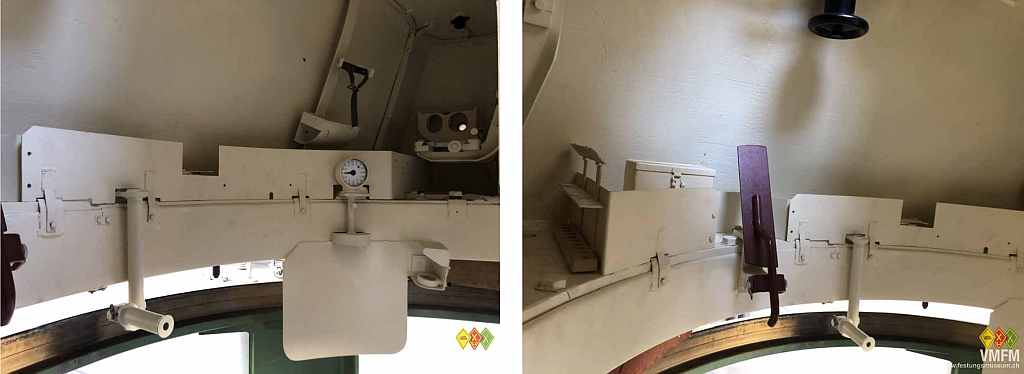
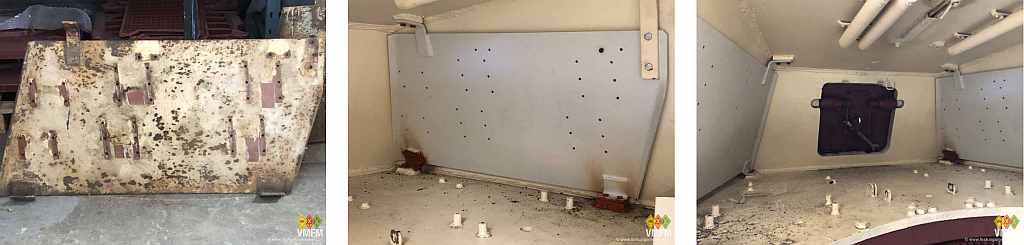
In the interior of the turret we have revised and mounted all four ring gear covers. On the left hand side one single stowage sheet which extends from front to rear is mounted on the covers. It was missing entirely on our Tiger and we have made it from scratch. We took thickness and height from a different existing sheet and estimated length and bends from pictures.
On the right hand side the turret lock separates the stowage sheet into two pieces.
The most challenging project was the re-attachment of the cut-off large rear turret hatch.
We remember: Back then, following a lonesome decision Harald and me cut off the rear hatch through the mounting blocks because the hatch could be opened and closed only with severe forces.
The general displeasure of wide circles about it calmed down quickly when the hatch could be made very easy to move again in this way.
Björn crafted two new blocks, and we could start re-attachment. Careful welding and fixing the blocks with a rod that simulated the hatch made the attachment with very little rework possible.

We were very surprised to learn how easily the hatch moved up and down on its torsion bar.
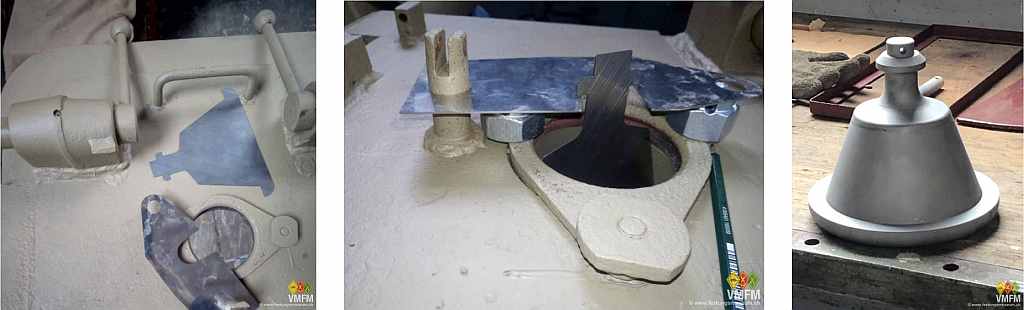
With the beautiful new hatch in place the missing lid of the gun port is missed the stronger. This lid is a massive metal piece of appr. 10 kg which is attached to the inner side of the hatch by two massive chains. One chain holds the lid and the other one is instrumental to pull back in place.
It was again the hour of Björn who created a lid and the locking bar on the inside from photos and available technical drawings, with the help of a 2d stencil and a wooden precursor.
Eventually the CNC-machined jewel appeared too precious to install.
The installation of the revised close defense weapon was easy going compared to the lid.
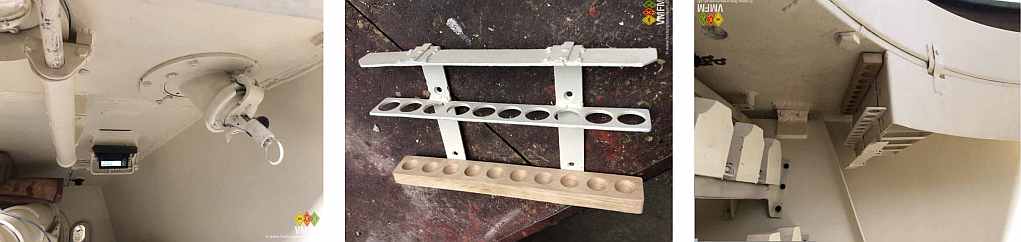
Further work in the turret concerned the restoration of one and generation of a second storage for 10 explosive rounds for close combat each to be shot with a special gun.
We also installed two massive sheet metals for the ammo stowage supporting arms in the rear of the turret. Each sheet holds 10 arms for a total of 11 rounds which are distributed on three levels: four on the lower and middle level and three on the upper level.
The restoration and installation will be a major task for the coming winter season
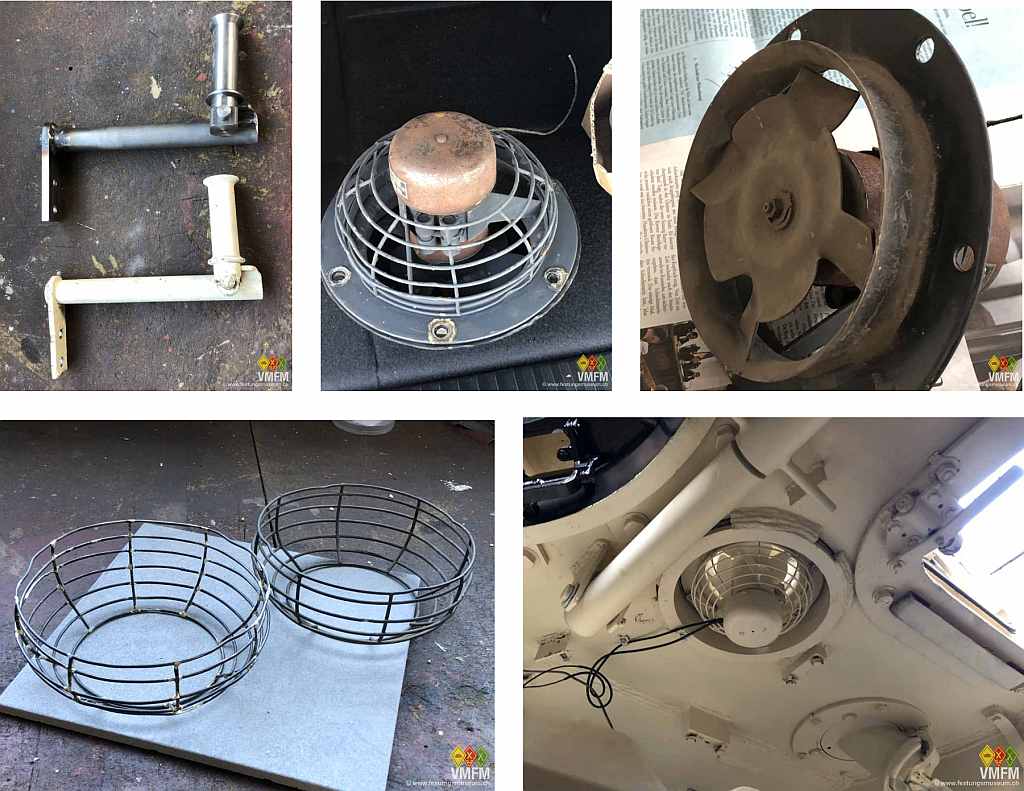
The three candles on the cake were represented by the azimuth indicator, the commander’s footrest and the turret roof fan which were all missing on our tank and which we were able to borrow from another museum for reproduction.
While the footrest was rather simple to reproduce, the fan was considerably more challenging and in particular the strangely curved fan blade was hard to work on. Fortunately the concave bended outer bow was still on our tank. We found an electric motor with very similar dimensions which very nicely fit into the new bracket with three arms to be welded into the concave bow.
The lower metal basket was my first larger soldering work. Thankfully the original was also crooked.
The most complicate task was the reproduction of azimut indicator which shows the direction of the turret relative to the hull. The upper casing of the scale is unbalanced and could not be casted, machined or milled. Eventually we had it 3d-printed.

The drive parts of the interior were also rather demanding and required some reworking until the transmission occurred smoothly.
The lower cover of the drive gear is a good example for not putting aesthetics too high in the specifications. Many weldings in the interior of the tank are carried out very rude and a reproducer should not fall for polishing everything to a nice look.